
When it comes to insulating your home, many people think of the attic as the main area to focus on. However, one often overlooked spot is the attic hatch. Insulating your attic hatch can significantly improve your home’s energy efficiency and comfort and reduce your energy bills. In this guide, we’ll explain why attic hatch insulation is so important and how you can easily add it to your home.
What Is Attic Hatch Insulation?
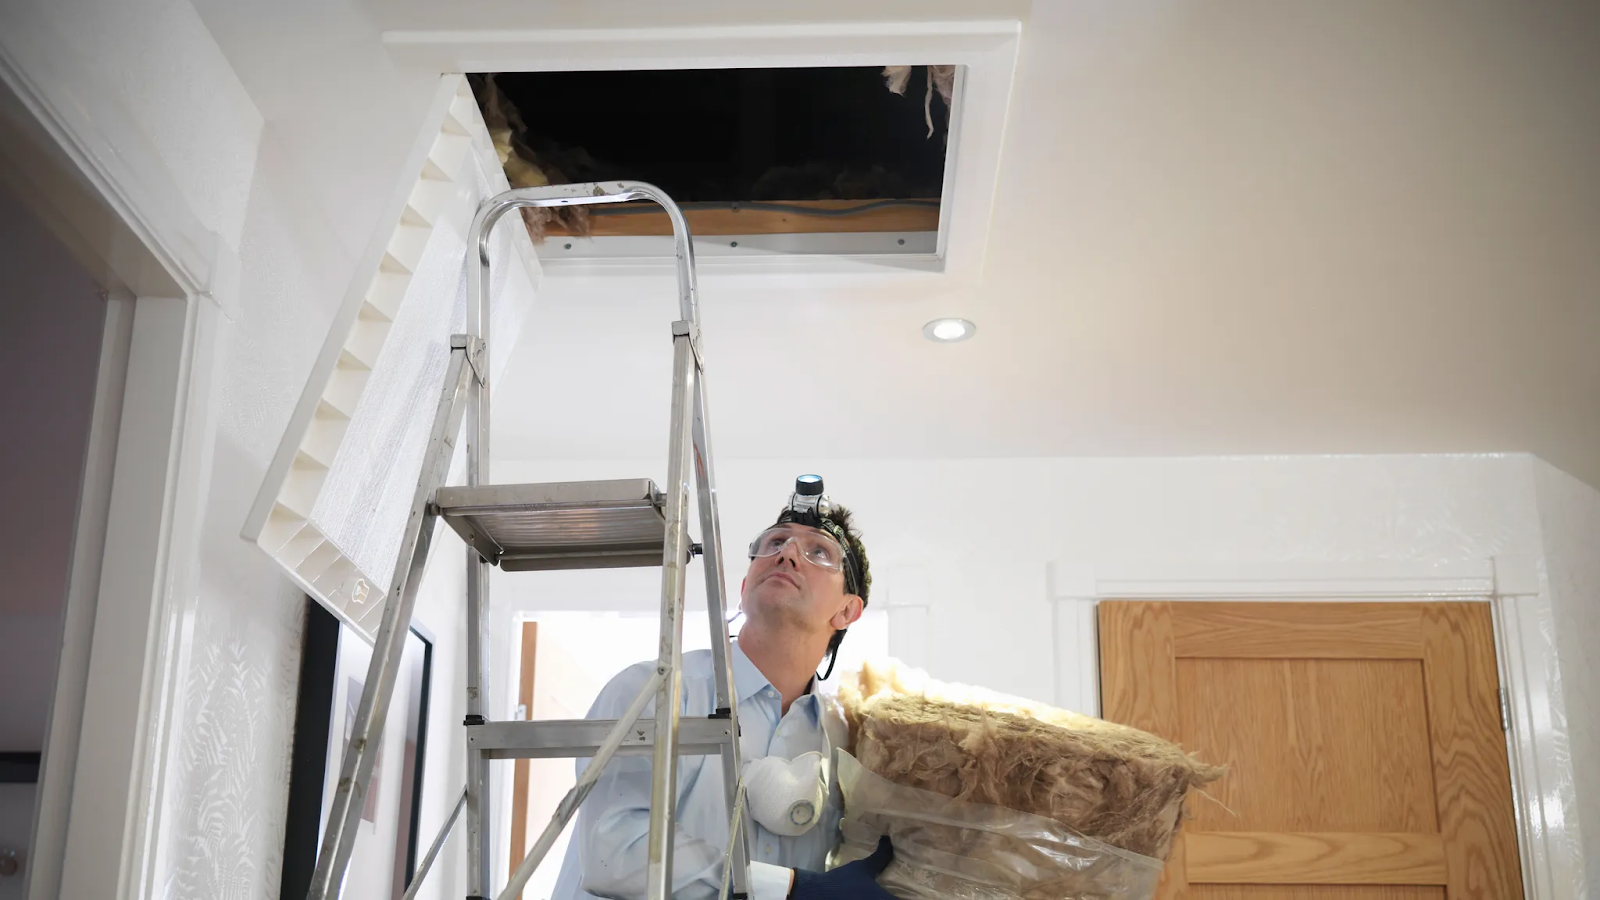
Attic hatch insulation is the process of adding insulation to your attic’s access point. This access point is usually a pull-down ladder or a fixed door. Many homes have an attic hatch that leads up to the attic space.
Often, this hatch is not insulated properly. As a result, heat is lost in the winter, and cool air is lost in the summer. The attic door becomes a weak point. It allows air to escape, which forces your HVAC system to work harder.
Attic hatch insulation works by sealing gaps around the hatch. It also involves adding insulating material to the hatch itself. This helps prevent the loss of warm or cool air from the living spaces below.
In turn, this makes your home more energy-efficient. There are different types of attic hatches. These include pull-down ladders and fixed panels. Each type of attic hatch benefits from insulation in different ways.
Benefits of Insulating Your Attic Hatch
Energy Savings
Insulating your attic hatch helps save money on energy bills. Without insulation, hot air in summer and warm air in winter escape, making your HVAC work harder. This increases energy costs. Insulation prevents these losses, lowering heating and cooling expenses.
Improved Comfort
Proper insulation helps maintain a consistent temperature in your home. Without it, rooms near the attic can feel too hot or cold. Insulating the hatch keeps temperatures comfortable throughout the house.
Noise Reduction
Attic hatch insulation helps reduce noise from the attic like air conditioning sounds or rain on the roof. It creates a quieter living environment inside your home.
Prolonged HVAC Lifespan
An uninsulated attic door strains your HVAC system, leading to more repairs and early replacement. Insulation reduces this strain, helping your system last longer and saving on costly repairs.
How to Insulate Your Attic Hatch
Step 1: Choose the Right Insulation Material
Before you start, select the right insulation materials. Some common options include:
- Foam Board Insulation: This rigid insulation is easy to cut and install. It’s great for DIY projects.
- Fiberglass Batt Insulation: Commonly used in walls and attics, its cheap price offers great thermal resistance.
- Weatherstripping: Apply this material around the edges of the attic to seal any air gaps.
- Reflective Insulation: Best used for hot attics, it helps reflect heat into the attic.
Step 2: Prepare the Attic Hatch
Next, prepare the attic hatch. If there’s old insulation or weatherstripping, remove it. Clean the hatch surface to help the new insulation adhere properly. If needed, wipe it down with a damp cloth.
Step 3: Apply Insulation to the Hatch
Cut the insulation to fit your attic hatch. For foam board, measure and cut it to the exact size. With fiberglass batt insulation, place it over the hatch. If using weatherstripping, apply it around the hatch edges to seal gaps.
Step 4: Seal the Gaps
Ensure there are no gaps around the attic. Use caulk or spray foam to fill cracks around the hatch frame. This keeps air from escaping or entering.
Step 5: Install a Hatch Cover
If your attic hatch doesn’t have a cover, consider installing an attic door kit insulation. A well-fitting cover seals the attic and prevents energy loss.
Common Mistakes to Avoid
- Not Sealing Gaps: Ensure there are no gaps, because even small ones can reduce insulation effectiveness.
- Choosing the Wrong Material: Select insulation that suits your climate and provides the necessary R-value for your home.
Best Insulation Products for Attic Hatches
If you’re looking for high-quality attic hatch insulation products, there are a few great options available on Insulation MarketPlace:
- Reflective Foam Core Insulation: This rigid insulation is often used for sealing attic door kits. It’s easy to install and provides excellent thermal resistance.
- Radiant Foil Attic: If you live in a hot climate, reflective foil insulation helps keep the attic cool by reflecting heat away.
Conclusion
Attic hatch insulation is an affordable and effective way to improve your home’s energy efficiency and comfort. By adding proper insulation to your attic hatch, you’ll save money on energy bills, reduce noise, and create a more comfortable living space. Explore the best insulation products on Insulation MarketPlace and start insulating your attic hatch.
FAQs About Attic Hatch Insulation
1. How much can attic hatch insulation save me on energy bills?
The amount of savings depends mostly on the size of your attic. Besides, the climate and the extent to which your attic hatch has been insulated are also important for energy saving. On average, homeowners can save up to 10-20% on heating and cooling money.
2. Can I install attic hatch insulation myself?
Yes, insulating your attic hatch is quite an easy DIY project. First, choose the right insulation material, then measure it carefully, and seal any gaps to ensure maximum energy efficiency.
3. What’s the best material for attic hatch insulation?
The best material depends on your needs. Foam board is great for easy installation and thermal resistance. Weatherstripping is best for sealing gaps. Reflective insulation is ideal for warmer climates.
4. How often should I replace my attic hatch insulation?
As long as the insulation is intact and not damaged, it can last for many years. Inspect it regularly to ensure it’s still working effectively.